编写发布一个简单的包
新建 @napi-rs/cool
让我们从 @napi-rs/cli 开始。
使用 napi new 命令创建新项目:
napi new
? Package name: (The name filed in your package.json)
让我们给这个包起一个酷一点的名字: @napi-rs/cool
我们推荐将你的包发布到 npm scope 下。 因为 @napi-rs/cli
会在每个支持的平台下创建并发布很多个包。 如果这些包不在一个 npm scope
下,在发布的时候就会触发 npm spam
detection (opens in a new tab)。
napi new
? Package name: (The name filed in your package.json) @napi-rs/cool
? Dir name: (cool)
下一步你需要为你的酷包选择目录名,它的默认值是你的包名的后缀。我们就按 enter,使用默认值吧。
napi new
? Package name: (The name filed in your package.json) @napi-rs/cool
? Dir name: cool
? Choose targets you want to support (Press <space> to select, <a> to toggle all, <i> to invert selection,
and <enter> to proceed)
❯ ◯ aarch64-apple-darwin
  ◯ aarch64-linux-android
  ◯ aarch64-unknown-linux-gnu
  ◯ aarch64-unknown-linux-musl
  ◯ aarch64-pc-windows-msvc
  ◯ armv7-unknown-linux-gnueabihf
  ◉ x86_64-apple-darwin
(Move up and down to reveal more choices)
下一步是选择你想支持哪个平台。我想要支持所有平台,所以按 A 全选,然后按 enter。
napi new
? Package name: (The name filed in your package.json) @napi-rs/cool
? Dir name: cool
? Choose targets you want to support aarch64-apple-darwin, aarch64-linux-android, aarch64-unknown-linux-gnu
, aarch64-unknown-linux-musl, aarch64-pc-windows-msvc, armv7-unknown-linux-gnueabihf, x86_64-apple-darwin,
x86_64-pc-windows-msvc, x86_64-unknown-linux-gnu, x86_64-unknown-linux-musl, x86_64-unknown-freebsd, i686-p
c-windows-msvc, armv7-linux-androideabi
? Enable github actions? (Y/n)
下一步,你需要选择是否启用 GitHub CI 配置。如果你的项目将在 GitHub 上发布,那么你需要启用它。让我们在这里输入 Y 并按enter。
napi new
? Package name: (The name filed in your package.json) @napi-rs/cool
? Dir name: cool
? Choose targets you want to support aarch64-apple-darwin, aarch64-linux-android, aarch64-unknown-linux-gnu
, aarch64-unknown-linux-musl, aarch64-pc-windows-msvc, armv7-unknown-linux-gnueabihf, x86_64-apple-darwin,
x86_64-pc-windows-msvc, x86_64-unknown-linux-gnu, x86_64-unknown-linux-musl, x86_64-unknown-freebsd, i686-p
c-windows-msvc, armv7-linux-androideabi
? Enable github actions? Yes
Writing Cargo.toml
Writing .npmignore
Writing build.rs
Writing package.json
Writing src/lib.rs
Writing .github/workflows/CI.yml
Writing .cargo/config.toml
Writing rustfmt.toml现在@napi-rs/cli已经创建了一个名为@napi-rs/cool的新包,并且在cool目录下。
让我们进入这个目录并且做一些准备工作:
cd cool
yarn install我在这里使用yarn来安装依赖,你可以用你偏好的包管理器来代替它。
而现在的目录结构是这样的:
tree -a
.
├── .cargo
│   └── config.toml
├── .github
│   └── workflows
│       └── CI.yml
├── .npmignore
├── Cargo.toml
├── build.rs
├── npm
├── package.json
├── rustfmt.toml
└── src
    └── lib.rs
你的本地代码在 src/lib.rs中。.cargo/config.toml文件用于GitHub CI的交叉编译。一般来说,这个文件不会影响你在本地机器上的开发。
.github/workflows/CI.yml文件是GitHub Actions (opens in a new tab) 的配置文件。
build.rs 文件对于构建 Node.js 的 native addon 是必要的,不要删除它或把它移到其他地方。
在yarn安装完成后,你可以运行build命令来构建你的 native addon:
yarn build
yarn run v1.22.17
$ napi build --platform --release
    Updating crates.io index
  Downloaded proc-macro2 v1.0.34
  Downloaded once_cell v1.9.0
  Downloaded napi v2.0.0-beta.7
  Downloaded 3 crates (129.4 KB) in 2.35s
   Compiling proc-macro2 v1.0.34
   Compiling unicode-xid v0.2.2
   Compiling memchr v2.4.1
   Compiling syn v1.0.82
   Compiling regex-syntax v0.6.25
   Compiling convert_case v0.4.0
   Compiling once_cell v1.9.0
   Compiling napi-build v1.2.0
   Compiling napi-sys v2.1.0
   Compiling napi-rs_cool v0.0.0 (/cool)
   Compiling quote v1.0.10
   Compiling aho-corasick v0.7.18
   Compiling regex v1.5.4
   Compiling napi-derive-backend v1.0.17
   Compiling ctor v0.1.21
   Compiling napi-derive v2.0.0-beta.5
   Compiling napi v2.0.0-beta.7
    Finished release [optimized] target(s) in 37.11s
✨  Done in 37.80s.
然后现在的文件夹结构变成了这样:
tree -a -I target
.
├── .cargo
│   └── config.toml
├── .github
│   └── workflows
│       └── CI.yml
├── .npmignore
├── Cargo.toml
├── build.rs
├── cool.darwin-x64.node
├── index.d.ts
├── index.js
├── node_modules
├── npm
├── package.json
├── rustfmt.toml
└── src
    └── lib.rs
yarn build 命令为你生成了三个文件。
cool.darwin-x64.node 是 Node.js addon 二进制文件, index.js 自动生成的 JavaScript 绑定文件,它帮你从 addon 二进制中 export 出所有的东西,并且保证对 esm 与 CommonJS 的兼容。index.d.ts 是生成的 TypeScript 定义文件。
new命令从 src/lib.rs 中为你生成了一个简单的 sum 函数。
#![deny(clippy::all)]

#[macro_use]
extern crate napi_derive;

#[napi]
fn sum(a: i32, b: i32) -> i32 {
  a + b
}
查看 index.d.ts 文件内容你可以看到 sum 函数的 TypeScript 定义已经帮你自动生成:
/* eslint-disable */

export class ExternalObject<T> {
  readonly '': {
    readonly '': unique symbol
    [K: symbol]: T
  }
}
export function sum(a: number, b: number): number
让我们创建一个 test.mjs 文件来测试生成的 sum 函数:
import { sum } from './index.js'

console.log('From native', sum(40, 2))
执行!
node test.mjs
From native 42
恭喜你! 你已经成功的创建了一个 Node.js addon!
发布
很可惜你不能直接发布 @napi-rs/cool,因为你没有 @napi-rs npm scope 的发布权限。
但你可以新建一个你自己的 npm scope (opens in a new tab)。
一旦你创建了你自己的 npm scope, 你可以使用 napi rename 命令来重命名刚刚新建的 @napi-rs/cool 项目。
napi rename
? name: name field in package.json
假设你创建的 npm scope 名字叫 jarvis, 你可以在这里输入 @jarvis/cool:
napi rename
? name: name field in package.json @jarvis/cool
? napi name: (cool)
你不需要重命名 package.json 中的 napi name 字段,因为包的后缀并没有变化。 在这里按下 Enter 保留 cool 这个名字。
napi rename
? name: name field in package.json @jarvis/cool
? napi name: cool
? repository: Leave empty to skip
如果你想发布 NAPI-RS 构建的包,你需要一个 GitHub 仓库,因为你需要 GitHub Actions 来为你做自动化编译和发布工作。在这里输入你的 GitHub 仓库的 URL 即可:
napi rename
? name: name field in package.json @jarvis/cool
? napi name: cool
? repository: Leave empty to skip
? description: Leave empty to skip
输入 package.json 中的 description 字段,直接按下 enter 来跳过这个步骤。
现在你的软件包名称已经重命名为@jarvis/cool,你终于可以发布它了。
现在初始化 git 配置并将它推到 GitHub:
git init
git remote add origin git@github.com/yourname/cool.git
git add .
git commit -m "Init"
git push为了在 GitHub Actions 中发布你的包, 你需要在你的 GitHub 仓库中配置 NPM_TOKEN 环境变量.
在项目的 Settings -> Secrets 中新建 NPM_TOKEN 环境变量。
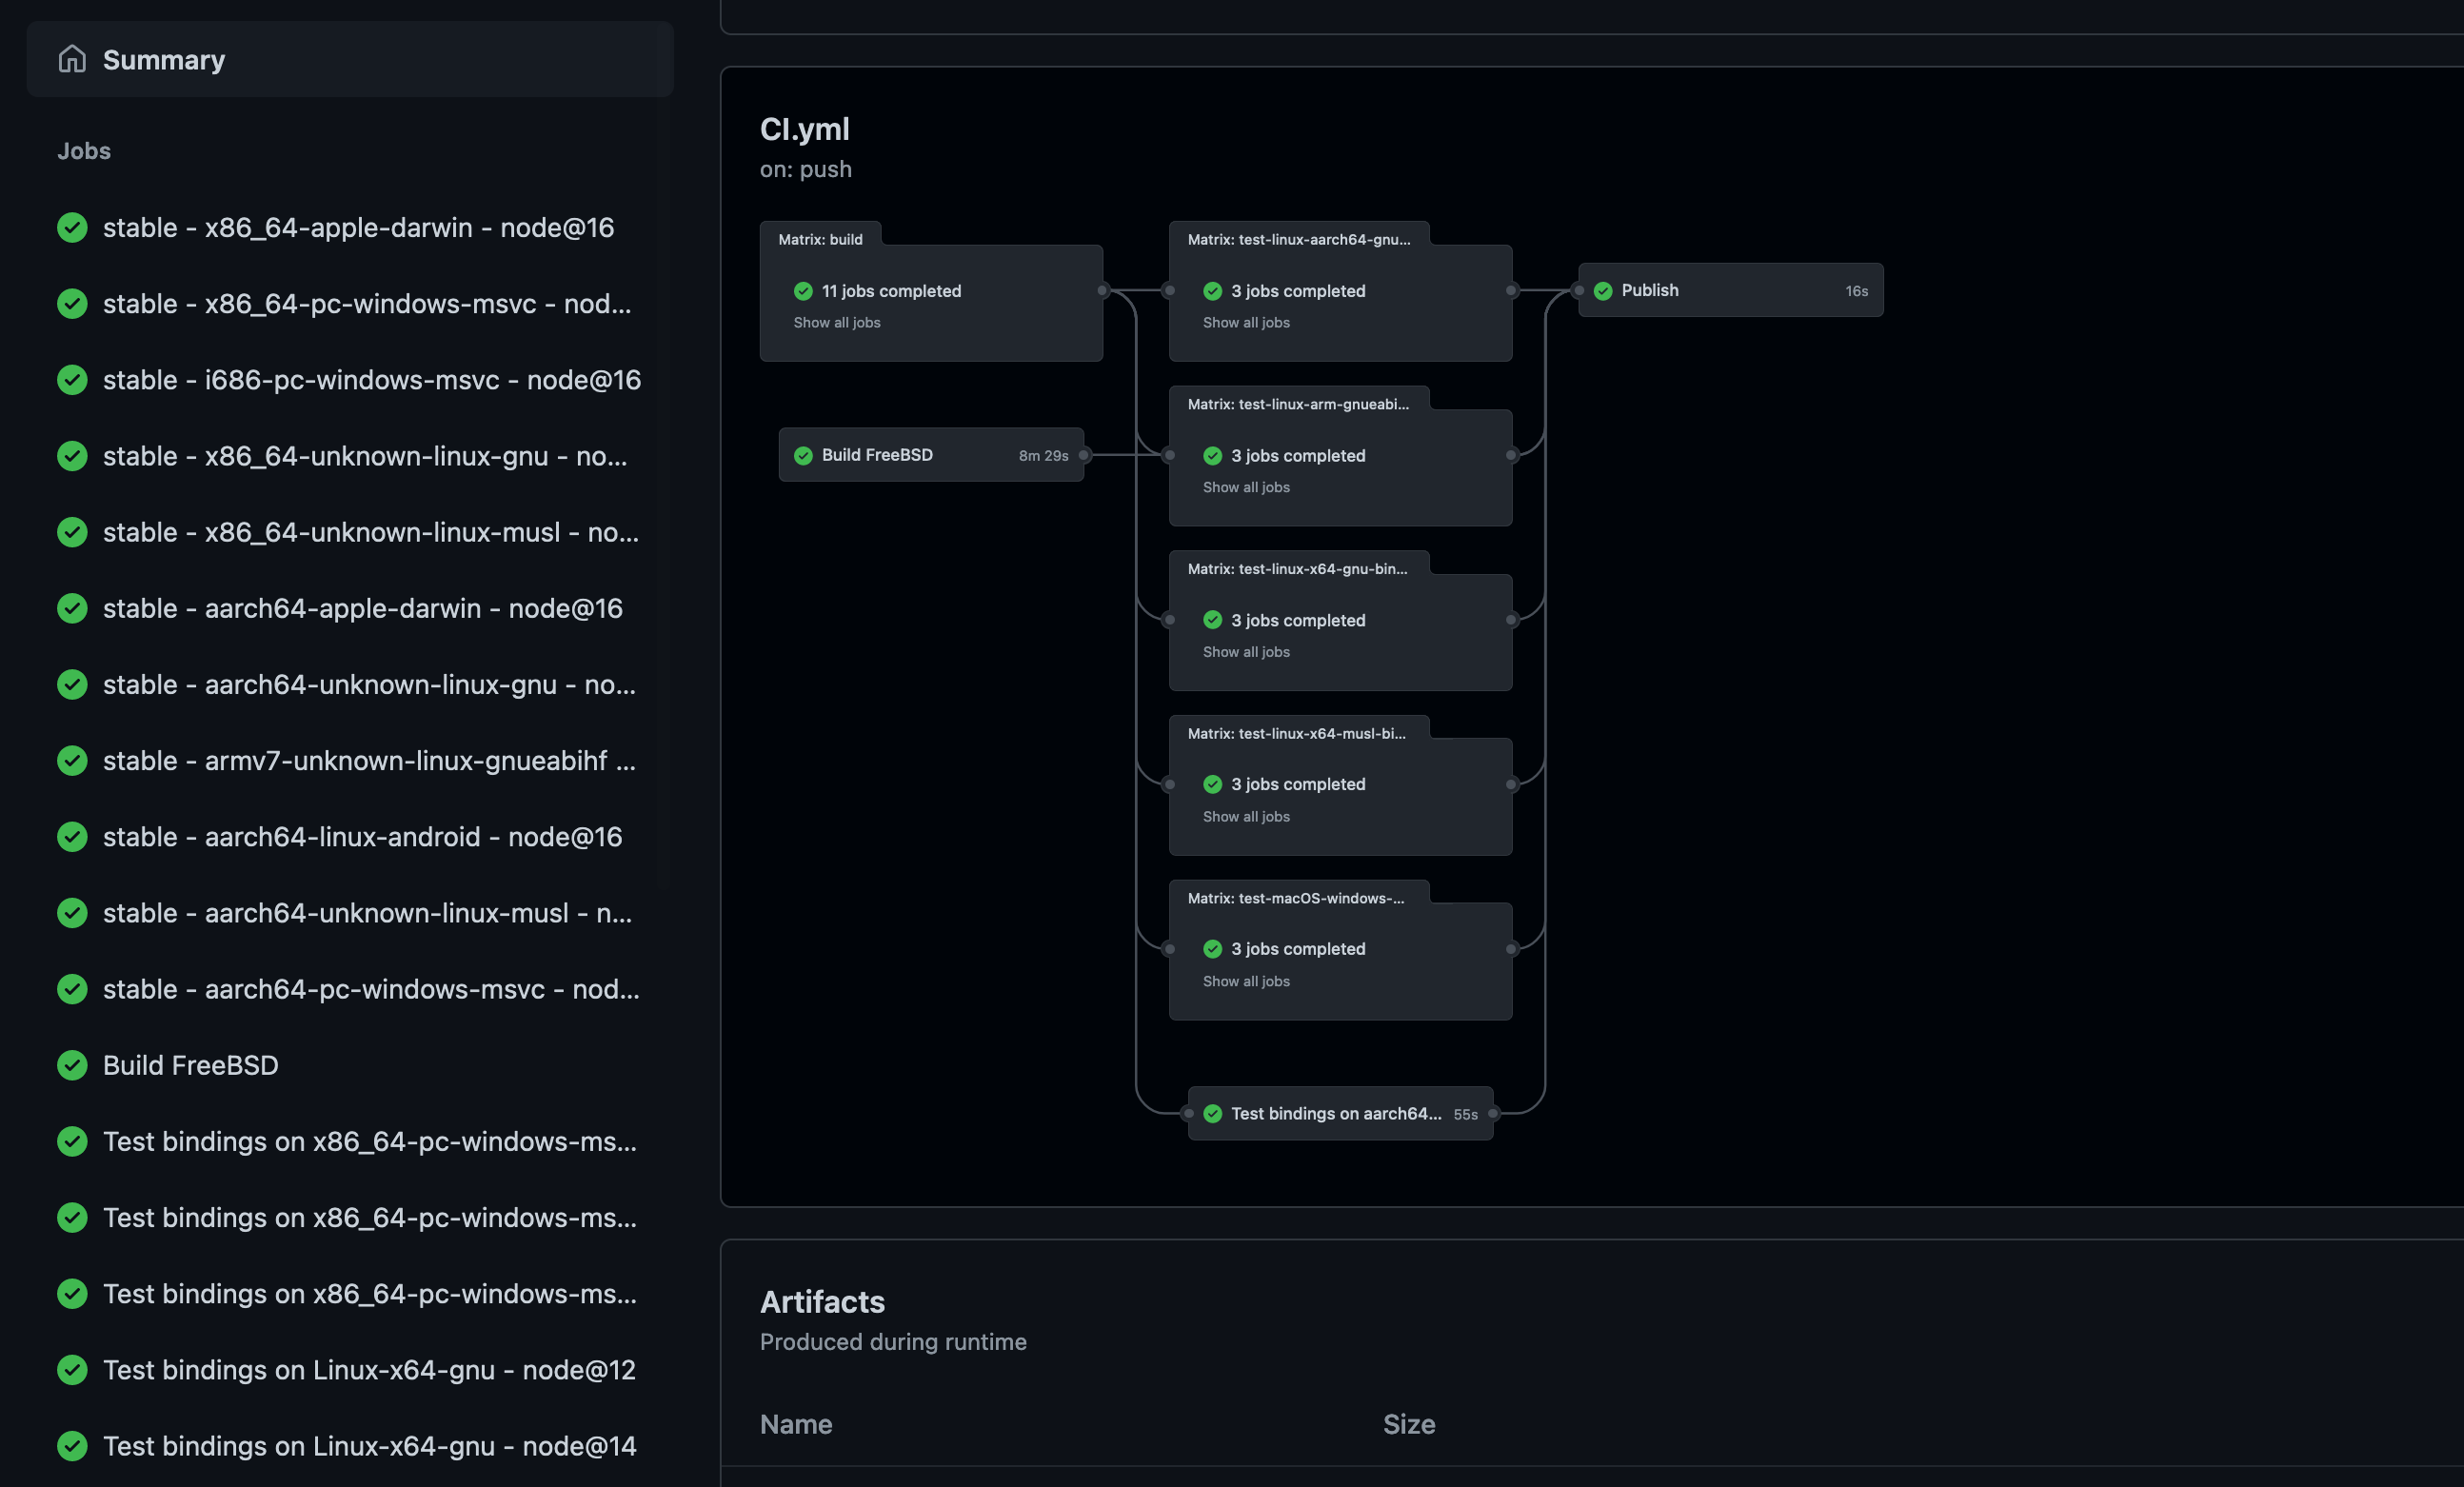
如果所有步骤都完成了,你可以在 GitHub 上看到如下的 CI 流程:

这是一个测试 CI,让我们来发布它吧:
npm version patch
git push --follow-tags
然后 CI 会自动编译并发布 @jarvis/cool。