A simple package
Create @napi-rs/cool
Let's start from the @napi-rs/cli.
Create a new project with napi new:
napi new
? Package name: (The name field in your package.json)
Let's give the package a cool name @napi-rs/cool:
It's recommend to use npm scope to name your package. Because @napi-rs/cli
will create and publish many packages per platform for you. If these packages
are not under a npm scope, it will trigger npm spam
detection (opens in a new tab) while your are
publishing them for the first time.
napi new
? Package name: (The name field in your package.json) @napi-rs/cool
? Dir name: (cool)
Next step you need to choose the directory name for your cool package, the default value of it is the suffix of your package name. Let's just press enter and use the default value.
napi new
? Package name: (The name field in your package.json) @napi-rs/cool
? Dir name: cool
? Choose targets you want to support (Press <space> to select, <a> to toggle all, <i> to invert selection,
and <enter> to proceed)
❯ ◯ aarch64-apple-darwin
  ◯ aarch64-linux-android
  ◯ aarch64-unknown-linux-gnu
  ◯ aarch64-unknown-linux-musl
  ◯ aarch64-pc-windows-msvc
  ◯ armv7-unknown-linux-gnueabihf
  ◉ x86_64-apple-darwin
(Move up and down to reveal more choices)
The next step is to choose which platform you want to support. I want all of them, so press A to choose all targets and press enter.
napi new
? Package name: (The name field in your package.json) @napi-rs/cool
? Dir name: cool
? Choose targets you want to support aarch64-apple-darwin, aarch64-linux-android, aarch64-unknown-linux-gnu
, aarch64-unknown-linux-musl, aarch64-pc-windows-msvc, armv7-unknown-linux-gnueabihf, x86_64-apple-darwin,
x86_64-pc-windows-msvc, x86_64-unknown-linux-gnu, x86_64-unknown-linux-musl, x86_64-unknown-freebsd, i686-p
c-windows-msvc, armv7-linux-androideabi
? Enable github actions? (Y/n)
The next step you need to choose whether to enable the GitHub CI configuration. If your project will alive on GitHub then you need to enable it. Let's type the Y and press enter here:
napi new
? Package name: (The name field in your package.json) @napi-rs/cool
? Dir name: cool
? Choose targets you want to support aarch64-apple-darwin, aarch64-linux-android, aarch64-unknown-linux-gnu
, aarch64-unknown-linux-musl, aarch64-pc-windows-msvc, armv7-unknown-linux-gnueabihf, x86_64-apple-darwin,
x86_64-pc-windows-msvc, x86_64-unknown-linux-gnu, x86_64-unknown-linux-musl, x86_64-unknown-freebsd, i686-p
c-windows-msvc, armv7-linux-androideabi
? Enable github actions? Yes
Writing Cargo.toml
Writing .npmignore
Writing build.rs
Writing package.json
Writing src/lib.rs
Writing .github/workflows/CI.yml
Writing .cargo/config.toml
Writing rustfmt.toml
And now @napi-rs/cli has created a new package named @napi-rs/cool and under the cool directory.
Let's enter it and do some preparation:
cd cool
yarn install
I'm using yarn to install the dependencies here, you can replace it by your favorite package manager.
And now the directory structure is like this:
tree -a
.
├── .cargo
│   └── config.toml
├── .github
│   └── workflows
│       └── CI.yml
├── .npmignore
├── Cargo.toml
├── build.rs
├── npm
├── package.json
├── rustfmt.toml
└── src
    └── lib.rs
Your native codes are in src/lib.rs. The .cargo/config.toml file is used in GitHub CI for cross compiling. In general, this file does not affect your development on your local machine.
The .github/workflows/CI.yml file is the configuration file for GitHub Actions (opens in a new tab).
The build.rs file is necessary for building a native addon for Node.js. Don't delete it or move it to the other place.
After the yarn installation finished, you can run the build command to build your first native package:
yarn build
yarn run v1.22.17
$ napi build --platform --release
    Updating crates.io index
  Downloaded proc-macro2 v1.0.34
  Downloaded once_cell v1.9.0
  Downloaded napi v2.0.0-beta.7
  Downloaded 3 crates (129.4 KB) in 2.35s
   Compiling proc-macro2 v1.0.34
   Compiling unicode-xid v0.2.2
   Compiling memchr v2.4.1
   Compiling syn v1.0.82
   Compiling regex-syntax v0.6.25
   Compiling convert_case v0.4.0
   Compiling once_cell v1.9.0
   Compiling napi-build v1.2.0
   Compiling napi-sys v2.1.0
   Compiling napi-rs_cool v0.0.0 (/cool)
   Compiling quote v1.0.10
   Compiling aho-corasick v0.7.18
   Compiling regex v1.5.4
   Compiling napi-derive-backend v1.0.17
   Compiling ctor v0.1.21
   Compiling napi-derive v2.0.0-beta.5
   Compiling napi v2.0.0-beta.7
    Finished release [optimized] target(s) in 37.11s
✨  Done in 37.80s.
And now the folder structure is like this:
tree -a -I target
.
├── .cargo
│   └── config.toml
├── .github
│   └── workflows
│       └── CI.yml
├── .npmignore
├── Cargo.toml
├── build.rs
├── cool.darwin-x64.node
├── index.d.ts
├── index.js
├── node_modules
├── npm
├── package.json
├── rustfmt.toml
└── src
    └── lib.rs
Here is three more files that yarn build command generated for you.
cool.darwin-x64.node is the Node.js addon binary file, the index.js is the generated JavaScript binding file which helps you export all the stuffs in the addon to the package caller. And the index.d.ts is the generated TypeScript definition file.
The new command generated a simple sum function for you in the src/lib.rs:
#![deny(clippy::all)]

#[macro_use]
extern crate napi_derive;

#[napi]
fn sum(a: i32, b: i32) -> i32 {
  a + b
}
And you can inspect the index.d.ts file and see the sum function has generated for you:
/* eslint-disable */

export class ExternalObject<T> {
  readonly '': {
    readonly '': unique symbol
    [K: symbol]: T
  }
}
export function sum(a: number, b: number): number
Let's create a test.mjs file to test the generated sum function:
import { sum } from './index.js'

console.log('From native', sum(40, 2))
Execute it!
node test.mjs
From native 42
Congratulations! You have successfully created a native addon for Node.js!
Publish it
Unfortunately, you can't publish the @napi-rs/cool because you don't have permission to publish packages to the @napi-rs npm scope.
However, you can create your own npm scope: https://docs.npmjs.com/creating-and-publishing-scoped-public-packages (opens in a new tab).
Once you have created your own npm scope, you can use the napi rename command to rename the project just created.
napi rename
? name: name field in package.json
Assume you just created a npm scope named jarvis, you can type @jarvis/cool here:
napi rename
? name: name field in package.json @jarvis/cool
? napi name: (cool)
You don't need change the napi name field in the package.json because the package suffix is not changed. Just type Enter to keep the cool name.
napi rename
? name: name field in package.json @jarvis/cool
? napi name: cool
? repository: Leave empty to skip
And you need a GitHub repository if you want publish a NAPI-RS package, because you need the GitHub Actions to do the compiling jobs for you. Just type your GitHub repo URL here.
napi rename
? name: name field in package.json @jarvis/cool
? napi name: cool
? repository: Leave empty to skip
? description: Leave empty to skip
And the description field in the package.json. Leave it empty to skip.
Now your package name is renamed to @jarvis/cool, you can finally publish it.
Now init the git configuration and push it into GitHub.
git init
git remote add origin git@github.com/yourname/cool.git
git add .
git commit -m "Init"
git pushIn order to publish packages in GitHub Actions, you need to configure the NPM_TOKEN environment variable in your GitHub repo.
In the project Settings -> Secrets, add your NPM_TOKEN into it.
If everything works fine, you will see the following CI matrix:
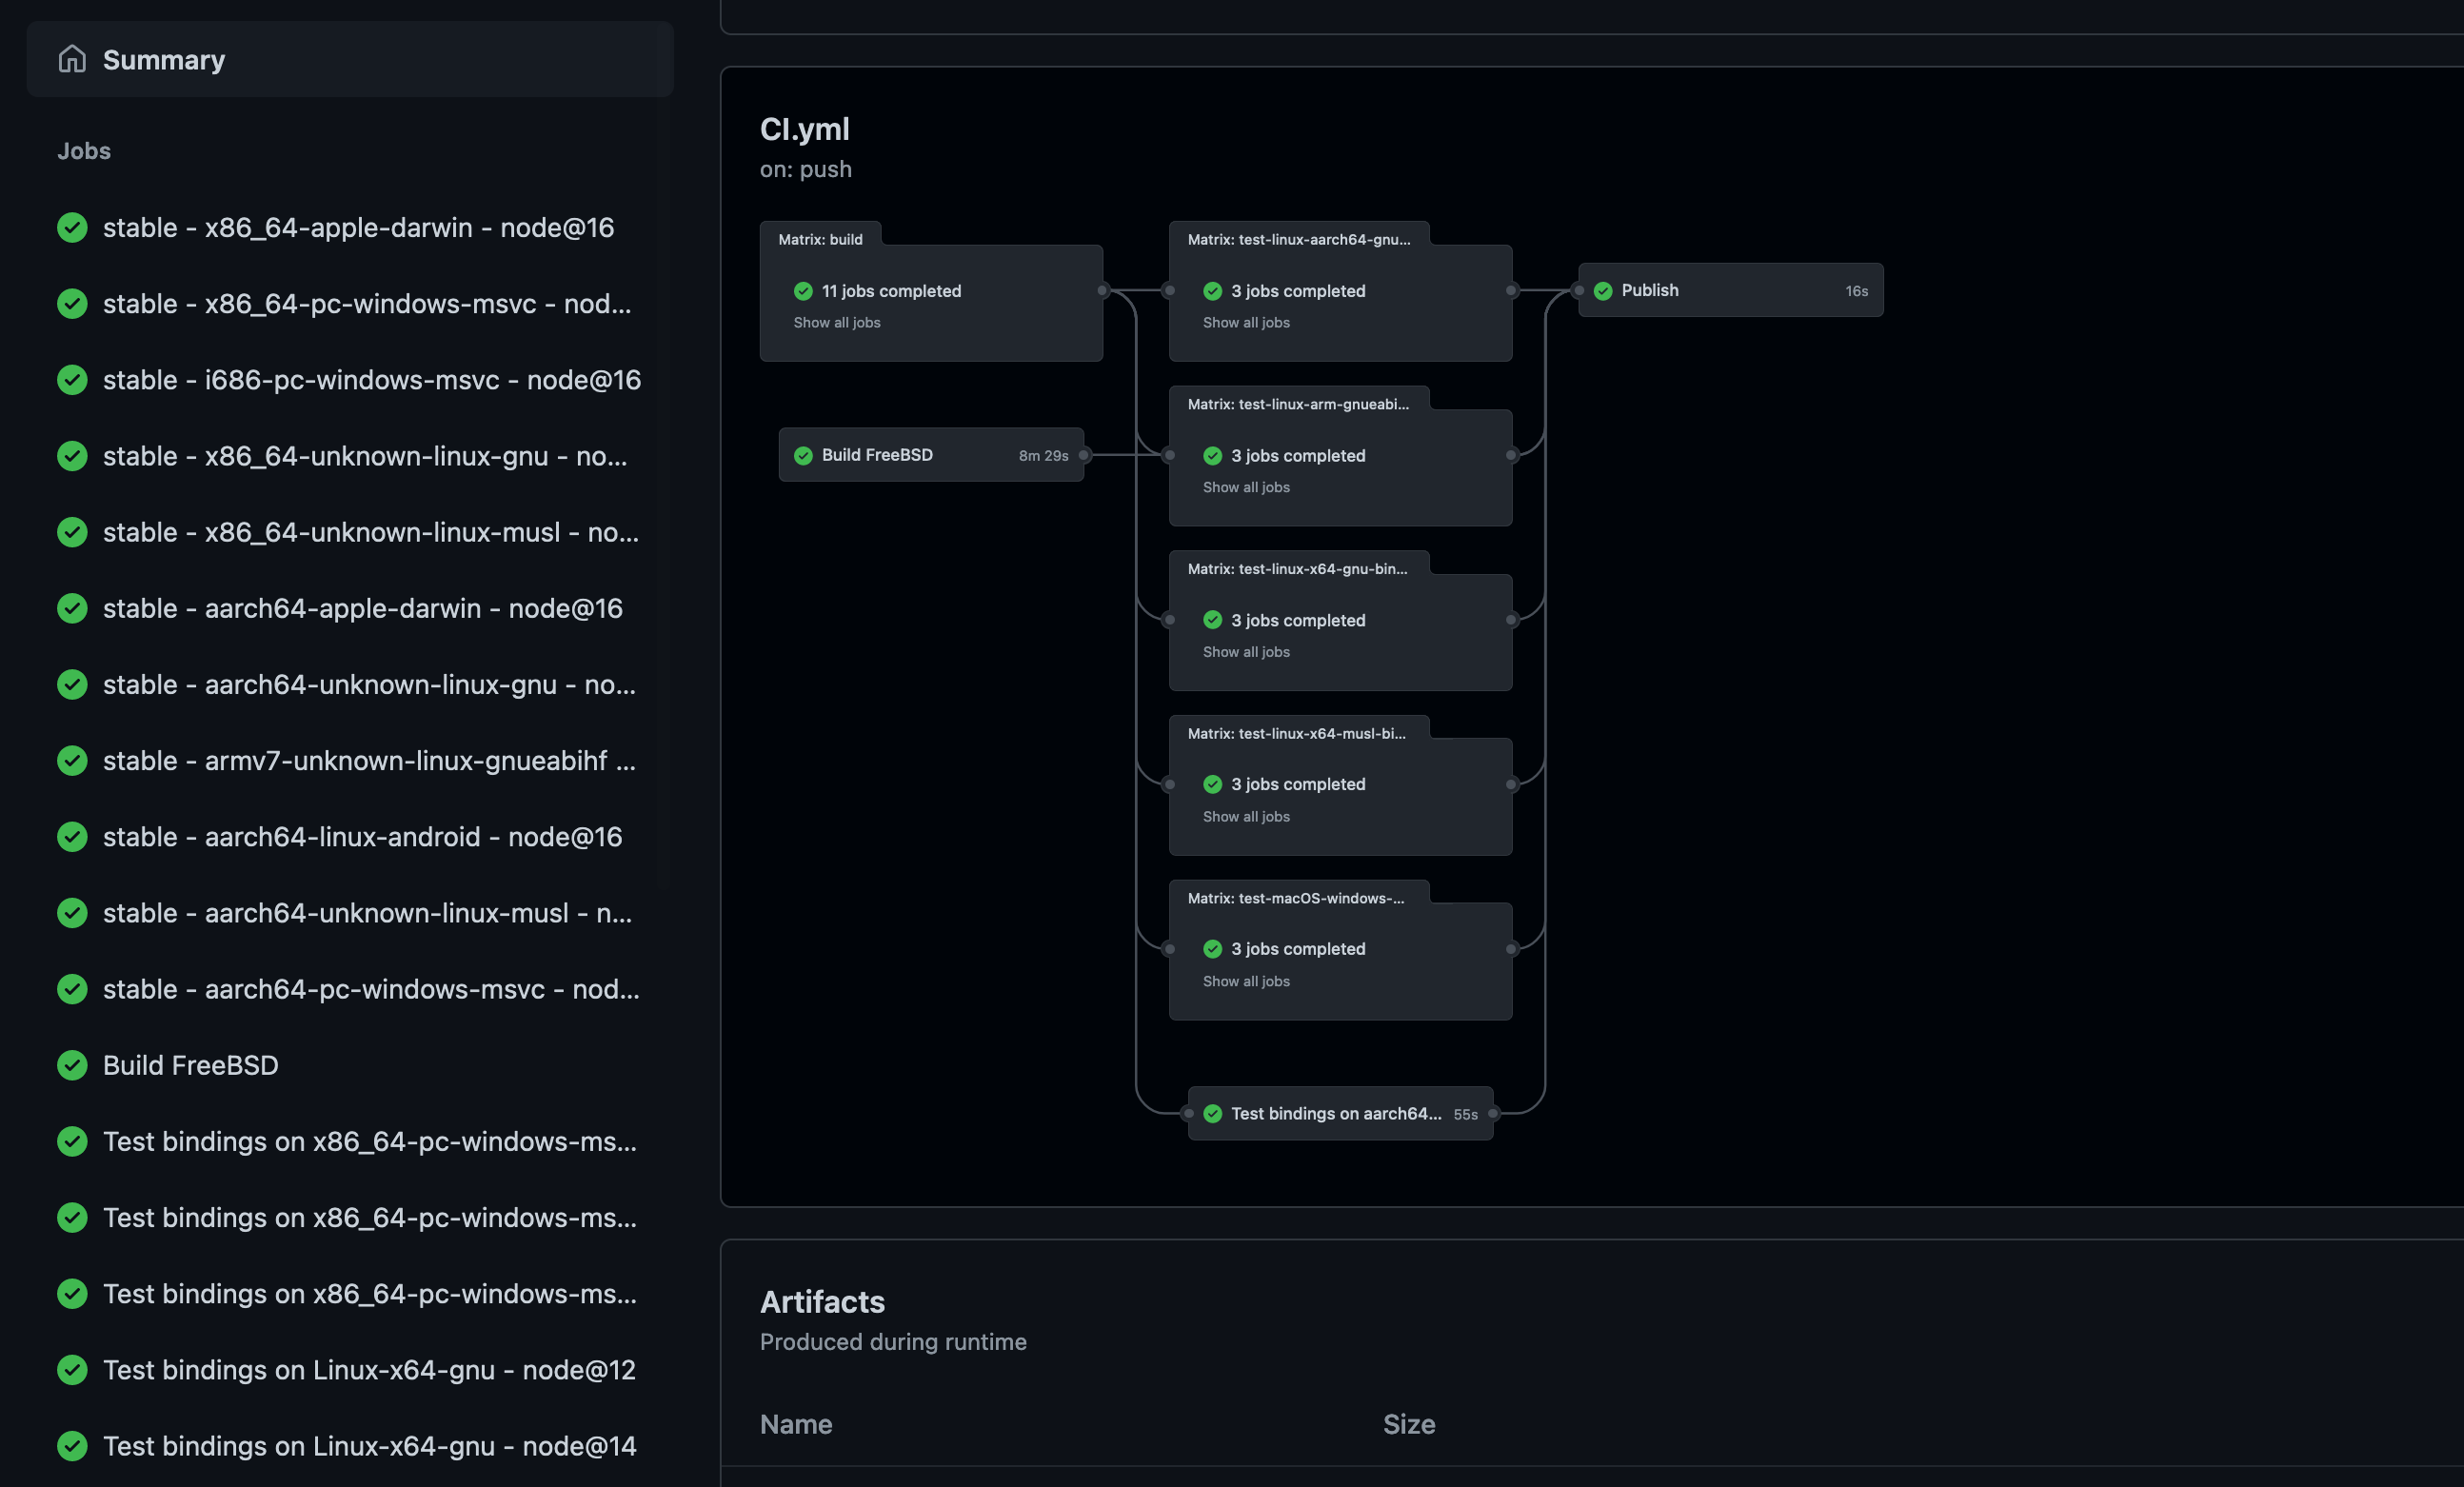
This is just a test CI matrix, let's finally publishing this package:
npm version patch
git push --follow-tags
And the CI matrix will build and publish your @jarvis/cool package.